Zen and The Art of Piercing

Art Nouveau design and the metalwork of the early 1900s has fascinated me since the earliest days of my
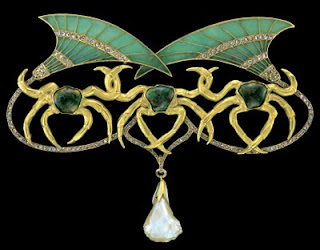
career. Observing the detail and intricacy of the jewelry crafted by artists such as Rene Lalique and Georges Fouquet ,I'm amazed at what they were able to accomplish at that time. Contemplating this, I found myself inspired to
focus on breaking down the techniques of their creations and mastering each individually .
The first technique to practise was something I had stopped using enough in my own work, The art of my jeweler's saw. I spent the first week of my challenge focused on one of the first skills I was introduced to at SCAD.

Project one in " Intro to Jewelry" in 1993 which taught us about using our jeweler's saw to pierce out a design. I still remember what I pierced, two little gecko lizards
in a mirrored design. I realized it was time to become reaquainted with my saw and the amazing detail that very tool brought to many of the pieces I love
so much.
As I began to prepare my challenge inspired by Micheal David Sturlin and a recent workshop he taught, Zen and the Art of the Jeweler's Saw, I decided a knotwork would be my subject.
Step #1 Design and Layout
As I began I realized the layout and transfer is really the most important step. The Skeleton or Backbone so to speak and often my personal weakness.

I typically rush this stage and regret it later. There are a few great methods for transferring your design.
Photocopy and Laser Printer Transfer Method, Pencil and Ink transfers, and more are techniques used and are described in depth at this link . Once I transferred my design I decided to take it a step further, leading us to our next stage.
Step #2 Engrave the layout

Since discovering engraving , I seem to find a new use for my gravers each day. On this day sure enough, my 120 degree Graver became step 2 . Follow this link for advice on sharpening various gravers. This step really adds to the precision of your design. Depending on the intricacy of the design it can help in the accuracy of your cut when you begin sawing. The added benefit is the bright cut keyline left behind as a pleasant by product.
 Step #3 Drilling
 Each negative space you wish to have begins with a scribe point and then a drilled hole. Drill bit size depends on the size of the detail and the sheet. In this case I was working with 20 guage sheet and the spaces were quite small. I chose a #65 drill bit.
Step #4 Piercing with a jeweler's saw
The final step is to Pierce the details out. As per the suggestion of Micheal David Sturlin I used a 3/0 Blade for the first time, which I loved. It was tight
enough to get all of the detail and yet had a great sturdiness to it. I was even able to use it like a file to help clean up the interior of my cuts.

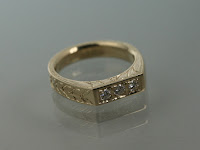
This is where the Zen part comes in . As I worked, I realized how much my cut related to my posture and my breathing. By relaxing into it and imagining my blade as the needle of a sewing machine, I settled into fluid strokes upward and downward timed with even breathes in and out . I am proud to say , I only broke one blade on the piece pictured here...
Of course it happened when I let my posture go and lost the flow for a moment.
Lesson learned through this challenge is this is a moment in which slow and steady does win the race. Enjoy and be inspired!


Comments
Post a Comment